Manual File Upload
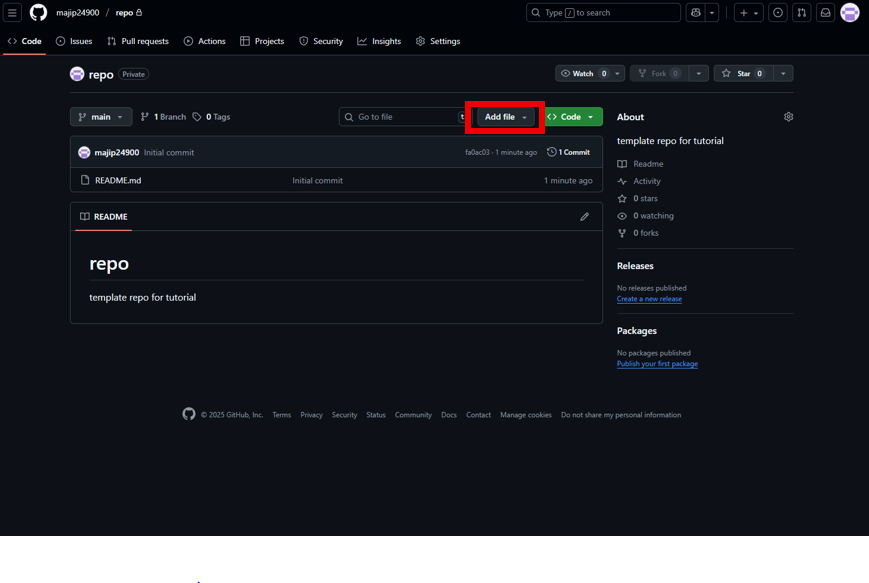
Once your repository is created, you can start adding files. GitHub makes it easy to upload files directly from your computer without needing Git installed. Here’s how to upload them manually:
- Open your repository on GitHub.
- Click the Add file button and select Upload files.
- Drag and drop files from your computer, or click to browse and select them.
- Scroll down and add a commit message (e.g., “Initial upload”).
- Click Commit changes to save the files to your repository.
Editing Files Online
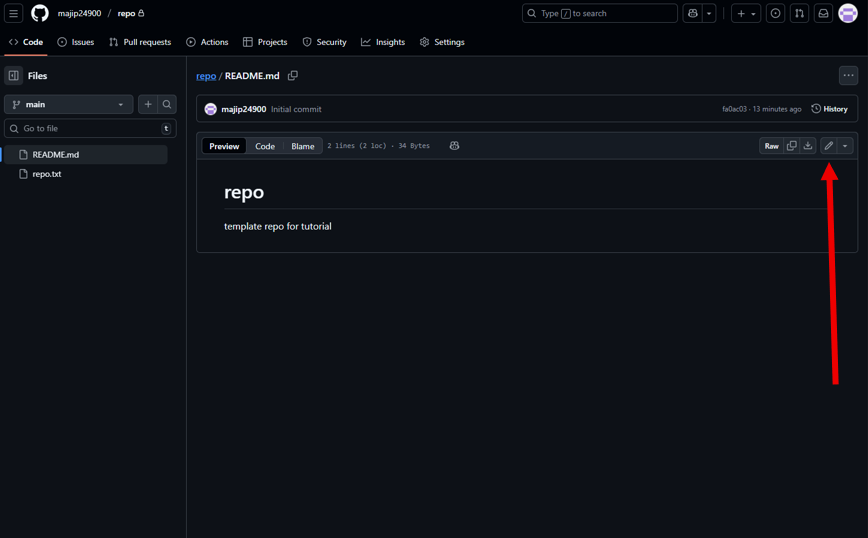
GitHub lets you edit files directly in your browser, which is useful for quick changes. Here’s how:
- Click on the file you want to edit.
- Click the pencil icon in the top-right corner.
- Make your changes in the editor.
- Scroll down and write a commit message describing your update.
- Click Commit changes to save.
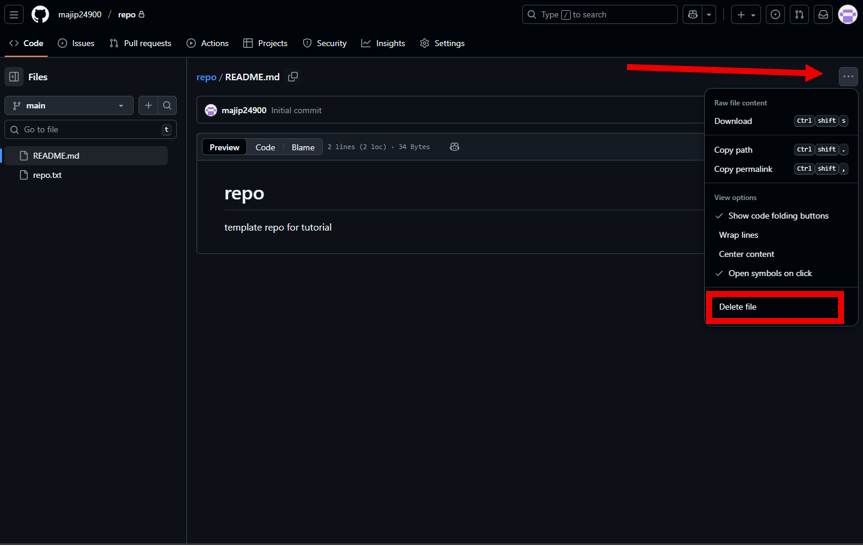
Additonally, you can delete a file here too.
- Click on the 3 dots.
- On the drop-down menu, click on delete.
- Commit Changes.
For larger edits or coding projects, you’ll eventually want to use Git locally or GitHub Codespaces, but the browser editor is perfect for small fixes.
Tips for Managing Files
- Use meaningful commit messages to track changes.
- Keep your README file updated as your project evolves.
- Use folders to separate code, assets, and documentation.
- Review file history to understand how your project has changed over time.
Continue to GitHub Codespaces
Now that your files are in place, you’re ready to explore GitHub Codespaces for cloud-based development. Visit the GitHub Codespaces page to continue. There, you’ll learn how to edit and run code directly in the cloud without needing to install tools locally.